The jointed stick figure
You'll learn to capture a pose in 30 seconds with a line of action, two axes and six joint points.
15 min
People don't hold still until you're done. The man at the kiosk turns round, the woman on the bench gets up, the child runs off. If you want to draw people out and about, you need a method that grabs the essentials in seconds. That method is a stick figure, but one that knows more than the one from school: it has joints, a spine and a direction.
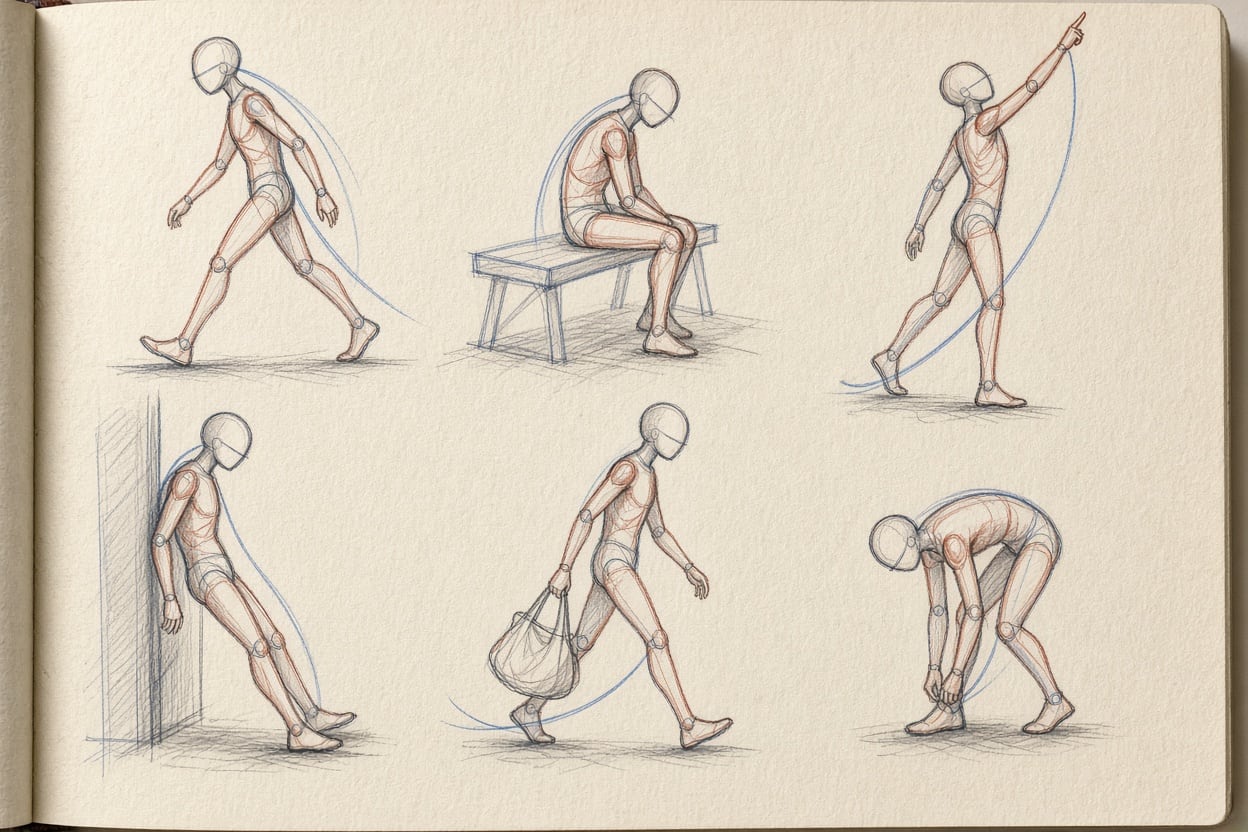
The line of action first
Before you draw anything else, pull a single line through the whole pose. It starts at the head, follows the back and runs down into the leg carrying the weight. This is the line of action, or gesture line. It is almost never completely straight. For someone leaning against a wall it's a gentle curve; for a child stretching to reach a ball it's a clear arc.
The line of action forces you to see the pose as a whole before you get lost in the parts. If it's right, the figure feels alive even when everything else is still rough. If it's missing, your figures stand there like fence posts.
Head, shoulders, hips
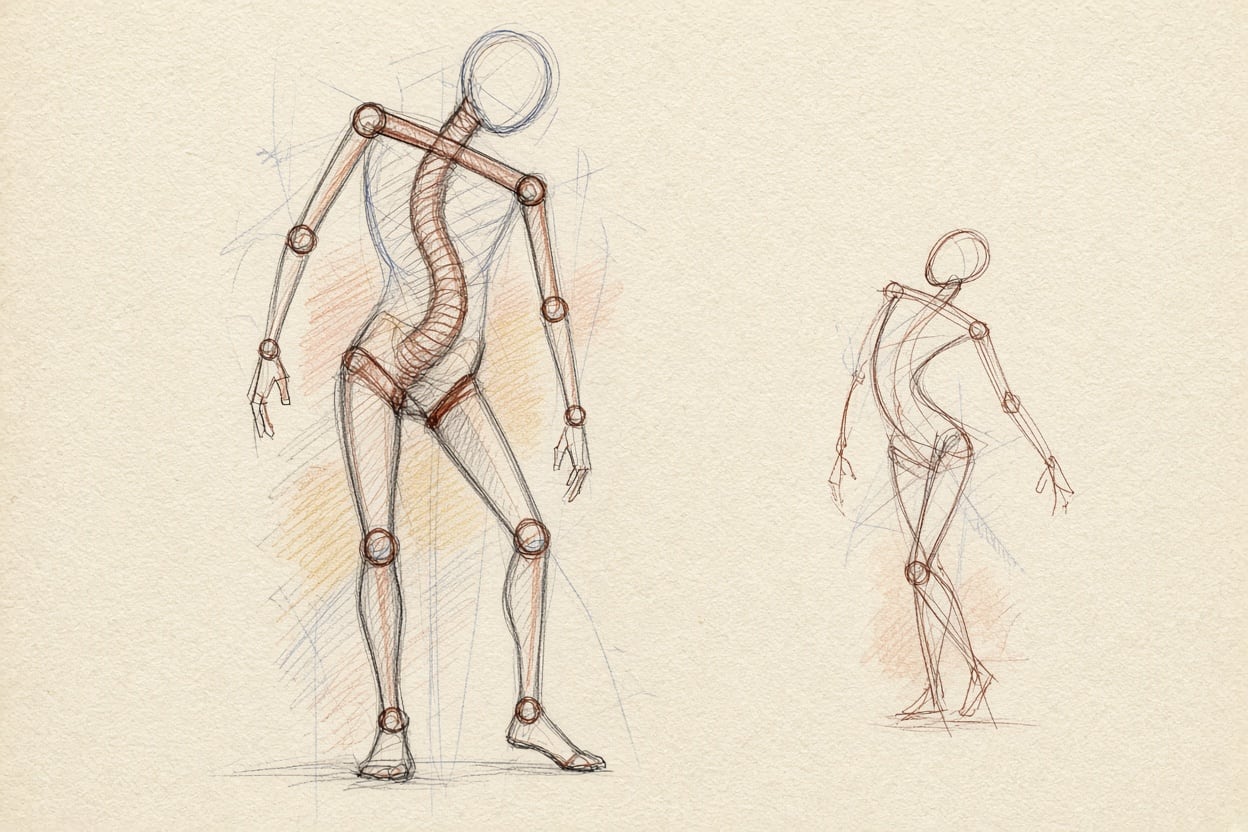
At the top of the line of action, place an oval for the head. Then come the two most important marks in the entire figure: the shoulder line and the hip line. Think of them as two axes running across the body.
These two axes are hardly ever parallel. When someone stands on one leg, the hip rises on that side and the shoulders tilt the other way to compensate. When someone turns, one axis gets shorter because you're seeing it at an angle. Look closely at which way each line tilts, and feel free to exaggerate a little. A small angle on paper often reads as smaller than it really is.
Between the two axes, the spine connects ribcage and pelvis. Draw it as a curve, not a rod. The spine is flexible: it bends forwards, backwards and sideways, and that bend carries a lot of what a pose expresses.
The joint points
Now attach the arms and legs, not as long strokes but from joint to joint. At the ends of the shoulder line sit the shoulder joints. From there you go to the elbow, then to the wrist. At the ends of the hip line sit the hip joints; from there you go to the knee and the ankle.
Put a small dot or circle at each joint. That does two things. First, you immediately see where the arm bends, and the figure gains attitude. Second, you can check the lengths from the previous lesson: is the elbow at waist height, does the wrist reach the crotch, is the knee in the right place?
Six points per side are enough: shoulder, elbow, wrist, hip, knee, ankle. Hands and feet get a short stroke for now, nothing more.
Thirty seconds
The goal of this lesson is speed. A pose in 30 seconds means: 5 seconds of looking, 3 seconds for the line of action, then head, two axes, spine and joints. It feels frantic at first, and the results look raw. That's how it should be. You're training your eye, not your ability to make pretty lines.
If someone moves before you've finished, just leave the figure and start the next one. After twenty sketches like this you'll notice your eye getting quicker. With every person, the first thing you'll see is the tilt of shoulders and hips.
A helper in the app
When you upload a photo with people in it, you'll find a button called «Show structure». The coach then lays the stick figure, with line of action, axes and joints, over the person, so you can compare whether you read the pose correctly. This helper is only there to aid your understanding; the drawing is yours to make.
Exercise
Set a timer for 30 seconds and draw twelve poses in a row, without a break. A park, a square, a station or a café window all work well. If nothing's happening outside, use photos of people in motion, for instance from the sports pages. Each figure gets a line of action, a head oval, shoulder and hip lines, a spine and the six joint points. No clothes, no faces. Afterwards, circle the three poses that feel most alive, photograph the page and show it to the coach.