Volume: bean, cylinder, box
You'll learn to give the stick figure volume with simple forms such as boxes, the bean and cylinders, so your people take up real space.
20 min
The stick figure from the last lesson shows the pose, but it's as flat as a wire coat hanger. A person has depth: a ribcage that swells forward, a pelvis that turns, arms that come towards you or move away. You don't need to know a single muscle to draw that. You simply swap the lines for basic solids you can picture in space.
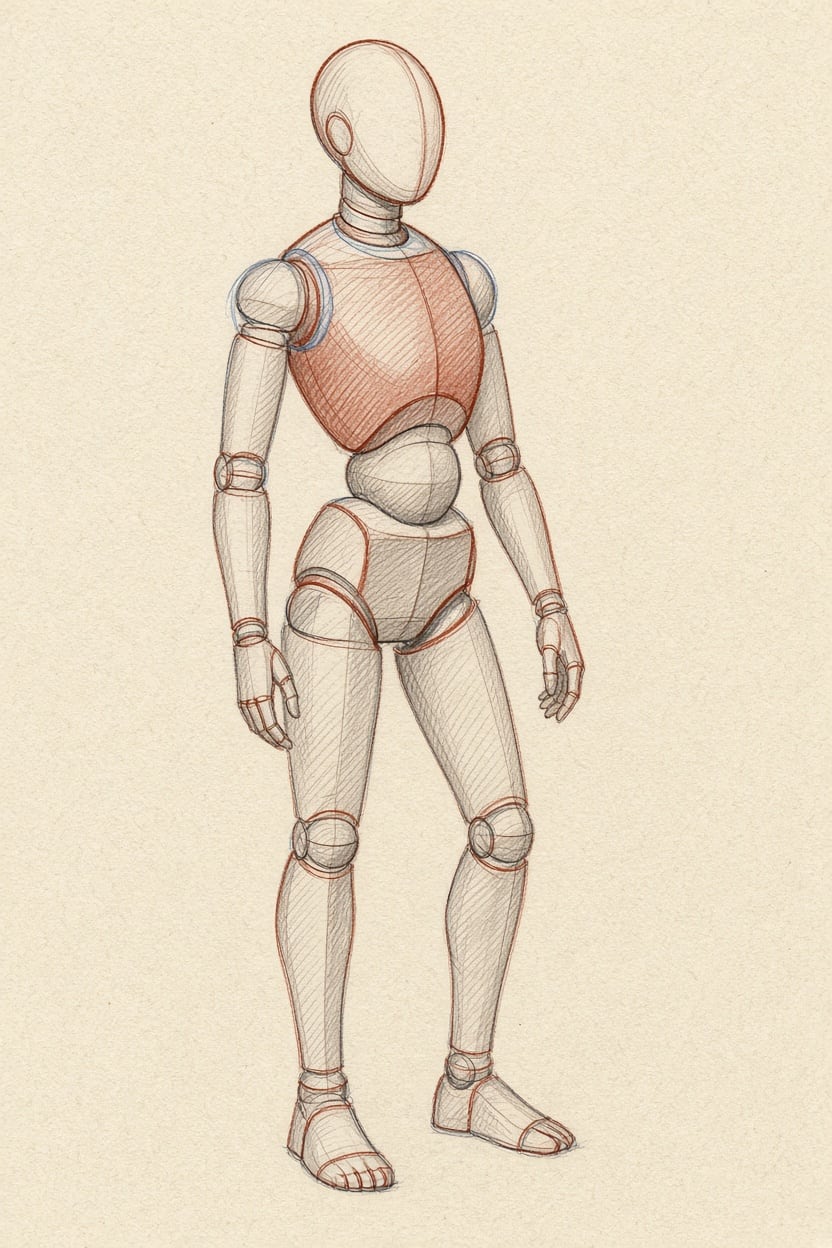
Ribcage and pelvis
The ribcage is the largest rigid mass in the upper body. Picture it as an egg standing with its wide end up, or as a slightly rounded box. The egg suits loose, soft sketches; the box shows more clearly which way the chest is facing, because you can see edges and planes.
The pelvis is the second mass. Think of it as a bowl open at the top, or as a flatter box. What matters is that ribcage and pelvis are two separate forms. Between them is the waist, and that's where the body moves.
The tilts of the shoulder and hip lines you already know now reappear as the top and bottom edges of these two forms. If the hips tip, the bowl tips with them. If the upper body turns, you see more of the side of the ribcage box.
The bean
For quick sketches there's a shortcut: the bean. You draw ribcage and pelvis as one single shape that looks like a bean, squashed on one side and stretched on the other. When someone bends forward, the belly side gets short and the back side long. When someone leans sideways, one flank compresses.
The bean is especially handy when time is short. It shows the twist and bend between upper body and pelvis in one outline. When you have more time, you split it back into its two masses.
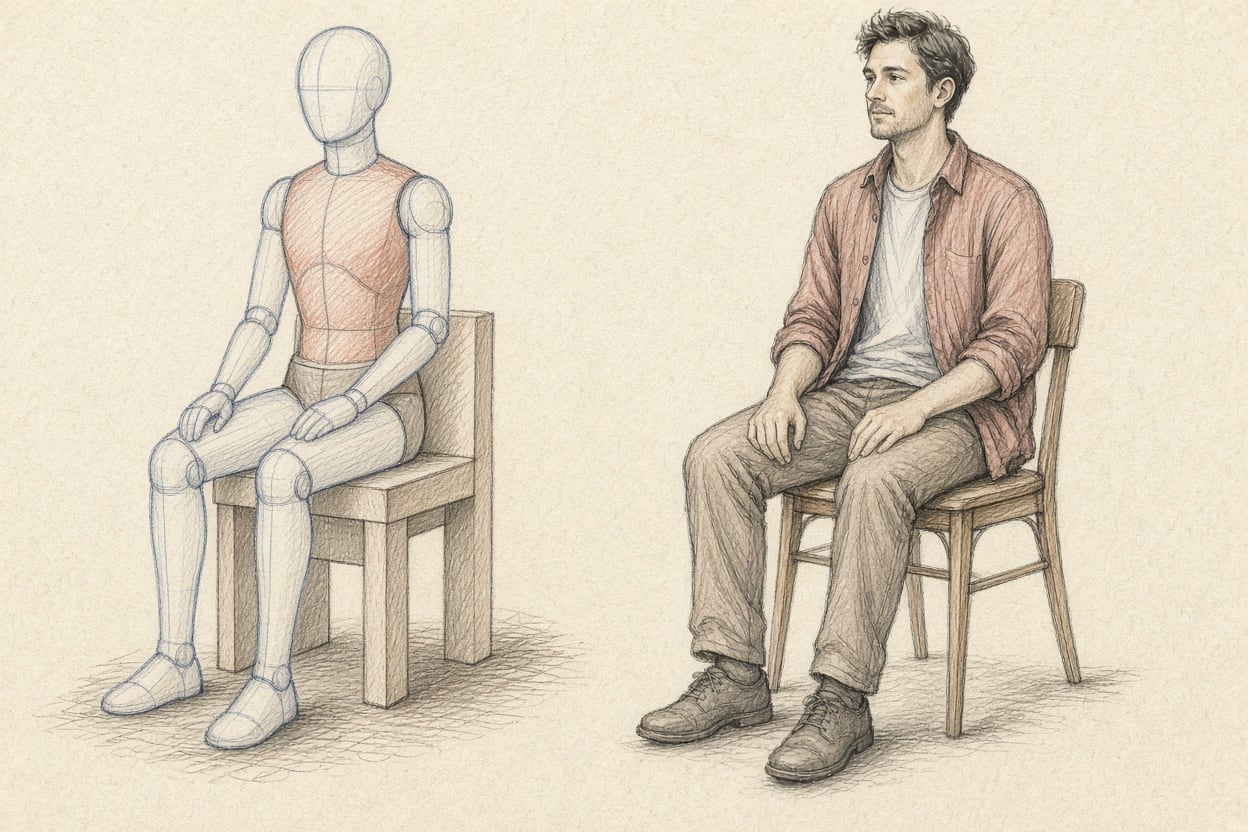
Arms and legs as cylinders
Upper arm, forearm, thigh and lower leg are drawn as cylinders: tubes with a round cross-section. Each segment gets its own cylinder, and the cylinders meet at the joint points. The thigh is thicker at the top than at the knee, and the forearm tapers towards the wrist, so you can make the tubes slightly cone-shaped.
The trick lies in the cross-sections. At one or two points along a cylinder, draw an ellipse, as if you were slicing through the tube. If the ellipse is almost round, the limb is pointing towards you or away from you. If it's narrow, the limb lies across your line of sight. Which way the ellipse curves tells the eye whether the arm is going forwards or back.
Overlaps create depth
When an arm passes in front of the body, it hides part of it. Draw that overlap deliberately: the line of the front cylinder carries on, the line of the one behind stops. It's the simplest way to show depth. The same goes for one leg in front of the other, or for the forearm covering the upper arm when someone raises a hand to their face.
Ovals and rectangles as scaffolding
If boxes and cylinders still feel like too much, start simpler. Wrap each body part in an oval or a narrow rectangle: one around the head, one around the torso, one around the pelvis, one for each section of the arms and legs. Draw these construction shapes lightly; they'll be covered later. They help you check proportions before the real contour goes down.
The «Show structure» button
For photos with people in them, the app offers a «Show structure» button. The coach then lays the stick figure, the volumes of ribcage, pelvis and limbs, and the head units over the person. You can see where the bean sits, how the cylinders run and how many heads tall the figure is. This helper is only there to aid your understanding; you make the drawing yourself, with your own eye and hand.
Exercise
Draw four figures, about 4 minutes each, from people in a café, on the train or from photos. For each one, start with the stick figure from the last lesson. Then build ribcage and pelvis on top as two boxes or as a bean, and construct the arms and legs as cylinders, with at least two cross-section ellipses per figure. Aim for one overlap in every figure. Use the remaining minutes to lay the contour over the construction. Photograph all four and show them to the coach.